


Article Introduction
Crème brûlée is a dessert loved for its velvety custard base and that crunchy, caramelized sugar topping. The highlight of this dessert is the process of caramelizing sugar on top, which turns into a crackling crust. Whether you’re an experienced baker or a newbie, learning how to caramelize brulee is an essential skill to elevate your dessert-making abilities, you may also try a crab brulée. This article will guide you through every step, tool, and technique to master caramelizing the perfect brûlée.
Part 1: Introduction and Basics
Introduction
When you think of crème brûlée, the first thing that comes to mind is the satisfying crack of caramelized sugar when you break through with a spoon. But what makes this topping so special? It’s all in the caramelization process, a method that transforms regular sugar into a brittle, sweet crust. To achieve this iconic texture, you’ll need some specific tools and a solid understanding of how caramelization works. Don’t worry, it’s easier than you think! Let’s start with the basics and the tools you’ll need.
Understanding the Process of Caramelization
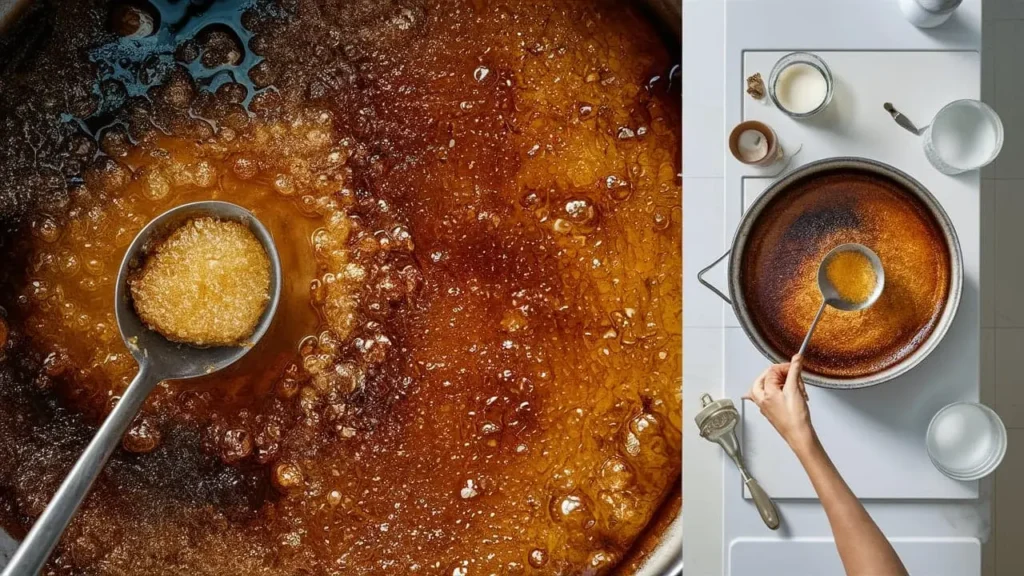
Caramelization is a natural process that happens when sugar is heated. When sugar reaches a high temperature (usually around 320°F or 160°C), it melts and begins to brown, creating a complex flavor that balances sweetness with slight bitterness. This reaction not only enhances the flavor of desserts like crème brûlée but also adds an appealing texture. A perfectly caramelized top gives that delightful crunch against the creamy custard base. It’s important to remember that caramelization is different from burning sugar – the key is heating just enough to develop that golden-brown sheen without going too far.
Tools for Caramelizing Crème Brûlée
To achieve the best results, using the right tools is essential. The good news is, you don’t need a whole kitchen full of gadgets – just a few essentials.
Blowtorch
The most popular tool for caramelizing crème brûlée is a culinary blowtorch. This tool lets you control the flame and caramelize the sugar evenly. Here’s why it’s a favorite:
- Control: You can adjust the intensity and distance of the flame.
- Precision: Direct the flame to specific areas for even browning.
- Speed: Caramelization happens within seconds.
If you want that perfect golden crust, a blowtorch is a must. But safety is important—always use a torch carefully and avoid overheating any one spot.
Oven Broiler
Don’t have a blowtorch? No worries! You can still achieve a caramelized sugar crust using your oven’s broiler. While this method may take slightly longer and requires a bit more attention, it’s still effective. Here’s how it works:
- Even browning: By placing the brûlée under the broiler, the heat radiates across the sugar, melting it evenly.
- Hands-free option: Unlike the torch, you don’t have to hold the tool directly over the sugar.
Other Tools
Some people use alternative methods like a kitchen torch or even a heated spoon, but these methods tend to be less effective. Whichever method you choose, be sure to keep safety in mind and always monitor the sugar as it caramelizes.
Part 2: Step-by-Step Guide for Caramelizing Crème Brûlée
Now that you know the basics and have your tools ready, it’s time to jump into the actual process of preparing and caramelizing your crème brûlée. We’ll walk through everything from prepping the custard to achieving that coveted caramelized sugar crust. Let’s get started!
How to Prepare Crème Brûlée for Caramelization
Before you even think about caramelizing the top, you need to make sure your crème brûlée is properly prepared and chilled. This is crucial because the custard must be set and cold before adding the sugar layer. If you attempt to caramelize the sugar on warm custard, you risk melting the custard itself, ruining the texture.
Make the Custard Base
- Brief Overview: The custard base of crème brûlée is typically made from egg yolks, sugar, cream, and vanilla. Once cooked, it’s poured into ramekins and baked in a water bath for even cooking.
- Cooling: Once baked, the custards need to cool completely in the fridge for at least 2 hours, but overnight is even better.
Chilling is Key
- Why chilling matters: Caramelizing the sugar requires intense heat. If the custard is too warm, it can melt during this process. A thoroughly chilled custard ensures the sugar melts while the base remains firm.
- Tip: Always chill your crème brûlée until it’s set, ideally for at least 4 hours or more, so it’s firm enough to support the caramelized sugar.
Choosing the Right Sugar for Caramelization
- Granulated Sugar vs. Caster Sugar: While both work, caster sugar melts and caramelizes more evenly due to its finer texture. However, granulated sugar will still give you that classic brûlée crunch, though it may take slightly longer to melt.
- Even Layer: The key to a perfect caramelized crust is to evenly distribute the sugar on top of the custard. Aim for a thin, uniform layer—too much sugar will result in uneven caramelization, while too little won’t provide enough crunch.
Step-by-Step Process for Using a Blowtorch
The blowtorch is the go-to tool for many when it comes to caramelizing crème brûlée. With its direct, intense flame, it quickly turns the sugar into a crisp, golden topping. Here’s how to do it right:
Step 1: Spread an Even Layer of Sugar
Start by sprinkling a thin, even layer of sugar over each chilled custard. Tilt the ramekin if needed to ensure the sugar coats the entire surface. You want just enough sugar to cover the top without excess.
Step 2: Hold the Blowtorch at the Right Angle
Hold the blowtorch about 2-3 inches above the surface of the sugar at a slight angle. This distance ensures you’re caramelizing without burning. Make sure the flame isn’t too close to avoid creating burnt patches.
Step 3: Move the Flame Consistently
Move the flame in small, circular motions across the sugar. Keep it moving to avoid burning one spot. The sugar will begin to melt and bubble, and as you move, it will turn golden brown. Continue until the entire surface is evenly caramelized.
Step 4: Watch for the Perfect Caramelization
You’ll know the sugar is perfectly caramelized when it forms a smooth, golden-brown crust with a glossy finish. Be careful not to overdo it—burnt sugar becomes bitter, which can overpower the delicate flavor of the custard.
Step-by-Step Process for Using an Oven Broiler
If you don’t have a blowtorch, don’t worry! You can use an oven broiler to achieve a similar result. While it’s slightly less precise than a blowtorch, the broiler method works well with some extra attention.
Step 1: Preheat the Broiler
Start by preheating your broiler on high. Place the oven rack in the highest position so the brûlées will be as close to the heat source as possible.
Step 2: Set Up a Sheet Pan
Place the ramekins on a baking sheet. To help prevent the custard from overcooking, you can place the ramekins in a shallow dish of ice water—this keeps the custard cool while the sugar melts.
Step 3: Monitor the Caramelization Process
Pop the sheet pan under the broiler and keep a close eye on the sugar. The sugar will start to melt and bubble within 1-2 minutes. Rotate the pan if needed to ensure even browning. Keep a watchful eye to avoid burning.
Step 4: Adjust Sugar and Heat Levels for Perfection
Depending on your oven, you may need to slightly adjust the broiler heat or the amount of sugar used. The goal is to get a golden crust without overcooking the custard beneath. Once the sugar is caramelized to a beautiful golden brown, remove from the oven.
Part 3: Advanced Tips and Variations
Now that you’ve mastered the basic techniques for caramelizing crème brûlée, it’s time to level up your skills with some advanced tips and variations. These methods will help you achieve that perfect, consistent caramelized sugar crust while avoiding common mistakes. Whether you’re using a blowtorch or broiler, there are several ways to take your caramelization technique to the next level.
Three Techniques to Achieve the Perfect Caramelized Crust
Achieving the ideal crunchy caramel topping isn’t always as straightforward as it seems. Here are three tried-and-tested techniques to get that perfect golden-brown finish every time.
1. Blowtorch Mastery
To really perfect your blowtorch technique, here are some expert tips that will elevate your results:
- Start with the edges: Begin caramelizing the sugar near the edges of the ramekin and work your way towards the center. This helps prevent uneven caramelization.
- Rotate the ramekin: Hold the crème brûlée at a slight angle and rotate it as you move the flame. This allows the sugar to melt evenly across the surface, creating a smooth, glass-like crust.
- Avoid hotspots: Pay attention to areas that brown too quickly. Adjust the flame or distance to avoid over-burning specific spots.
2. Use Brown Sugar for Richer Flavor
Although granulated sugar is the traditional choice for crème brûlée, brown sugar can add a deeper, richer flavor. The molasses content in brown sugar gives it a slightly different caramelization process:
- Slightly longer caramelization: Since brown sugar contains more moisture than white sugar, it may take a little longer to melt.
- Bold, toffee-like flavor: The molasses in brown sugar imparts a more complex, almost toffee flavor, which pairs beautifully with the creamy custard. If you’re feeling adventurous, give it a try!
3. Achieving a Uniform Golden-Brown Crust
If you want that perfect, even caramelized crust, consistency is key. Here’s how:
- Even sugar distribution: Always make sure the sugar is spread thinly and evenly across the surface of the custard. Any thick patches of sugar can cause the caramelization to be uneven.
- Rotating during caramelization: Whether you’re using a broiler or blowtorch, gently rotate the dish during the caramelization process to ensure all areas receive equal heat.
Common Mistakes and How to Avoid Them
No matter how skilled you are, mistakes can happen when you’re caramelizing crème brûlée. Here are some common issues and how to avoid them.
Uneven Caramelization
One of the most frustrating problems when making crème brûlée is uneven caramelization. Often, this happens when the sugar layer is too thick or when the flame or heat source isn’t applied evenly.
- Solution: Always spread the sugar in a very thin, uniform layer. Using a fine-mesh sieve to sprinkle the sugar can help ensure an even coat. Additionally, keep the flame moving and avoid holding it too close to any one spot.
Burnt Sugar
Burnt sugar can quickly overpower the delicate flavor of crème brûlée, leaving you with a bitter aftertaste. This usually happens when the sugar is caramelized too quickly, or the heat source is too intense.
- Solution: If using a blowtorch, hold the flame further away from the sugar and move it in continuous motions. If using a broiler, keep a close watch and rotate the ramekins to ensure even browning without burning.
Why the Custard Melts During Caramelization
One of the most common pitfalls is overheating the custard base during the caramelization process. This happens when the sugar is exposed to heat for too long, causing the delicate custard underneath to soften or melt.
- Solution: Always make sure your custard is thoroughly chilled before caramelizing. If using a broiler, placing the ramekins in a shallow dish filled with ice water can help keep the custard cool while the sugar caramelizes.
Part 4: FAQs and Troubleshooting
Caramelizing crème brûlée might seem tricky at first, but with the right techniques, it’s actually a breeze! Still, there are often questions that come up when tackling this iconic dessert. In this section, we’ll answer some of the most frequently asked questions and troubleshoot common issues. These tips will ensure your crème brûlée is picture-perfect every time.
Frequently Asked Questions (FAQs)
Can I caramelize crème brûlée without a blowtorch?
Absolutely! While a blowtorch is the preferred method for many because of its precision and speed, you can also use an oven broiler to achieve the same effect. Just be sure to watch your brûlées closely under the broiler to prevent burning.
- Tip: Place the ramekins on a baking sheet and keep them on the top rack under the broiler for even caramelization.
What type of sugar works best for caramelizing?
The best sugar to use is granulated white sugar or caster sugar. Both melt evenly and give that desirable crunchy caramelized crust. However, if you’re looking for a richer flavor, you might experiment with brown sugar, which adds a deeper, toffee-like sweetness.
- Anchor text suggestion: Learn more about the science of caramelization to understand how sugar reacts to heat.
How do I fix uneven caramelization?
Uneven caramelization often results from too much sugar in certain spots or uneven application of heat. To fix this:
- Ensure the sugar layer is thin and evenly spread before you begin.
- If using a blowtorch, move the flame continuously in small circular motions to avoid burning certain spots.
How long should I torch or broil the sugar?
It typically takes about 1-2 minutes to caramelize the sugar using a blowtorch and around 3-4 minutes using a broiler. The key is to keep a close eye on the process. You want the sugar to melt and form a golden-brown crust, but not to burn.
Why does my sugar burn too quickly?
If your sugar burns quickly, it might be because:
- The heat source is too close or too high.
- The sugar layer is too thin, causing it to caramelize too fast.
- Solution: Hold the blowtorch a little farther away and use gentle, continuous motions to evenly melt the sugar. If using a broiler, reduce the heat or move the brûlées a bit farther from the heat source.
Troubleshooting Common Issues
Overheating the Custard: What Went Wrong?
If your custard ends up melting or becoming runny after caramelizing the sugar, it’s likely because the heat applied was too intense or the custard wasn’t cold enough to begin with. The delicate custard needs to remain chilled during the caramelization process.
- Fix: Always refrigerate the custard until it’s fully set before applying the sugar. You can also place the ramekins in a shallow dish of ice water when using a broiler to help keep the custard cool.
Sugar Not Melting Evenly: Fixes and Prevention Tips
Sometimes, the sugar won’t melt evenly, leaving some areas uncooked while others are overcooked. This often happens if the sugar layer is uneven or the heat isn’t distributed properly.
- Fix: Make sure the sugar is spread in an even, thin layer. Use a fine-mesh sieve to help with even sugar distribution, and when using a blowtorch, ensure you’re moving the flame continuously to cover all areas.
Tips for Maintaining a Crisp Caramel Top After Refrigeration
If you plan on refrigerating your crème brûlée after caramelizing the sugar, you may notice the crisp top softening over time. To maintain the crunch:
- Tip: Caramelize the sugar just before serving for the best results. If you must refrigerate after caramelizing, let the brûlée sit at room temperature for a few minutes before serving to allow the top to firm up again.